 until a month ago, I had been using a 5th generation 60 GB iPod video. It served all the purposes I needed it to, except that I had over 60 gigs of music alone, and I wanted to store photos and videos on the iPod as well. When I had the money to buy a higher capacity iPod, I sold my iPod Video right before Apple's annual World Wide Developer Conference (WWDC), hoping that a new iPod might be announced at the event. No new iPod was announced, but I had already sold my Video, so I went out and bought a new 160 GB iPod Classic.
What I was expecting was nothing more than my old iPod with a higher capacity. What I got was a lot more than that. The new iPod offers a slew of small touches, both on the hardware and on the firmware running on the device.
The
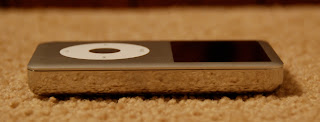
 advantages on the hardware side are that the screen is brighter and crisper, the battery life is more than twice as long, and the iPod still manages to stay the same size while more than doubling capacity. On my older iPod Video, the screen had a high enough resolution to display the important items, but the newer screen is both brighter and higher resolution, allowing more information to be displayed on the screen at once. As for battery life, my Video stopped at around 12 hours of playing music, but the new Classic will play it for 30 hours. On top of all that, the dimensions of the devices are almost identical, other than the shape of the front edge is shaped slightly differently.
The
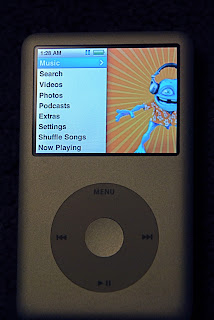
 firmware improvements include a better method of displaying the time in the top menu bar, artist names listed under song names while viewing playlists, and an overall sleeker and more appealing look and navigation through my media. On the Video, the top menu bar was usually taken by the name of the playlist or navigation menu you were in, so trying to check the time in the top bar was a time consuming process. The newer firmware takes advantage of the higher resolution screen and displays the time constantly, regardless of what menu you're in. Another slight annoyance I had with the Video was that many artists have songs with the same name (for example, I have 9 different songs, all called "beautiful" and all by different artists). If these songs were in a playlist, I wasn't sure which of the songs I was choosing. Again taking advantage of the higher resolution display, the Classic displays the artist of each song when looking at a playlist. Lastly, the Classic really utilizes album art that is tied to the songs in my library. At each music menu, the menu options are on the left side of the screen while albums that are in the current selection are faded in and out on the right. This often provides me with something random but good to start listening to and makes for an interesting way to pick music (another thing that is always a task for me).
Overall, the new iPod fit my goal of storing all my media on one device, but also surprised me with a number of small fixes and improvements in the user interface. I would recommend anyone who also has a few annoyances with their older firmware or needs a higher capacity to upgrade, and with current iPods still worth a lot of money, the upgrade shouldn't be nearly as costly as the initial purchase.
Full Disclaimer: I was an employee of Apple Inc., but I am not one currently.


